Storing data in ArcGIS Online is a great way to ensure that the information you need is never too far from your fingertips. However, hosting large datasets in the cloud can result in long rendering times – particularly if you work across a range of scales, or often change your symbology.
Vector tile layers can be used to solve some of these problems, and using them to store your data comes with faster rendering times, improved performance, and lower credit costs.
What are vector tiles?
Vector tiles are thankfully exactly what they sound like – clipped tiles containing vector features. This means that the geographic data they store is made up of points, lines, polygons, and text. Features are divided up and stored in tiles which display more efficiently in the web. Vector tile layers are traditionally used in basemaps, but can be useful if you’re after speedy visualisation of your data layers.
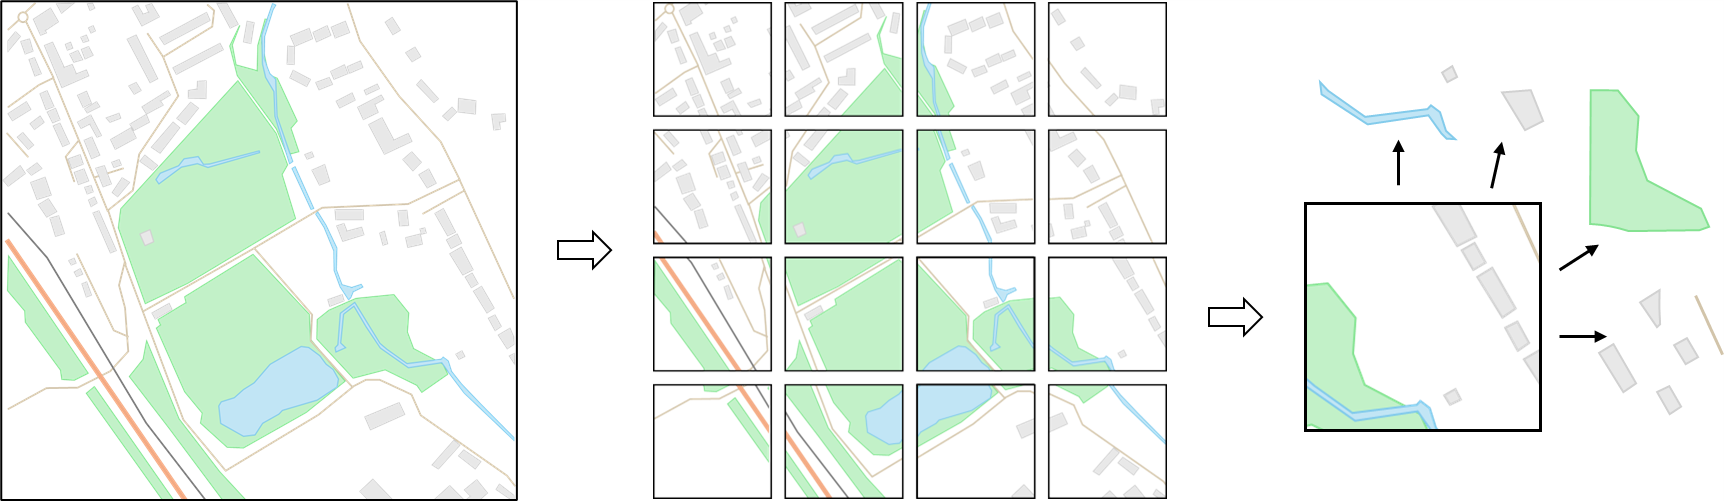
Makeup of a vector tile – data is stored as points, lines, polygons, and text.
Benefits of working with vector tiles
The main benefit of working with vector tiles over feature layers is that they have a smaller file size, which translates to faster rendering and improved performance. Vector tiles are also highly customisable, which means you can create and store multiple styles for your layers without hosting the source data multiple times. They can also adapt to different device sizes to give you improved display quality.
Since vector tiles are typically much smaller in size than feature layers, the cost to store and serve the tiles in ArcGIS Online is lower. Therefore, for large data layers where you require minimal functionality outside of fast visualisation, publishing your data as Vector Tile Packages from ArcGIS Pro can help to reduce your organisation’s credit consumption.
| Storage type | Credits cost (monthly) |
| Feature services | 2.4 per 10 MB |
| Map tiles | 1.2 per 1 GB |
–– Credit consumption of feature services and map tiles (2025 guidance only, for up-to-date rates please refer to the Credits documentation).
To put this difference into perspective, the GB Background vector basemap available in the ArcGIS Living Atlas consists of 2.2 GB of data layers. Using the credits costs in the table above, this would consume around 540 credits per month to host as a feature layer in ArcGIS Online. Comparatively, hosting the same layers as a vector tile would only consume 2.6 credits per month – a huge difference!
What can’t you do with vector tile layers?
You’ve probably seen all the above and thought “Perfect! Time to migrate all my data across to vector tiles”. However, it is important to keep in mind that vector tiles do have limited functionality compared to feature layers. There are some key reasons why you might want to stick with other layer types.
The big one is that vector tile layers have limited functionality in ArcGIS Pro and ArcGIS Online, since their primary purpose is visualisation. It is not possible to select or export features from vector tiles, and you aren’t able to query of view pop-ups. You can think of vector tiles as a snapshot image of your data; this means it’s not possible to edit or snap to the data. It’s important to consider the functionality which is important to you, as feature layers may be a better option depending on your use case.
Additionally, complex symbology may not render properly when published as a vector tile. In particular, gradient fills, hatched fills, markers along lines, and symbol effects should be avoided where possible in vector tile layers. Other symbology styles like complex dash patterns will appear simplified to ensure that the vector tile can perform well, so it’s worth checking the documentation to ensure your symbology is compatible.
Configuring vector tiles
If you have an existing feature layer, hosted tile layers are really easy to configure in ArcGIS Online. From the Item Details page of your layer, choose to Publish a Vector Tile layer. If you have a specific layer in mind which you’d like your tile layer to display alongside (such as a British National Grid layer), you can configure that in the settings – if not, the tiling scheme will align with the ArcGIS Online basemaps. And it’s as easy as that! You now have a vector tile layer which will give you all the benefits of speedy rendering and enhanced performance in your web maps.
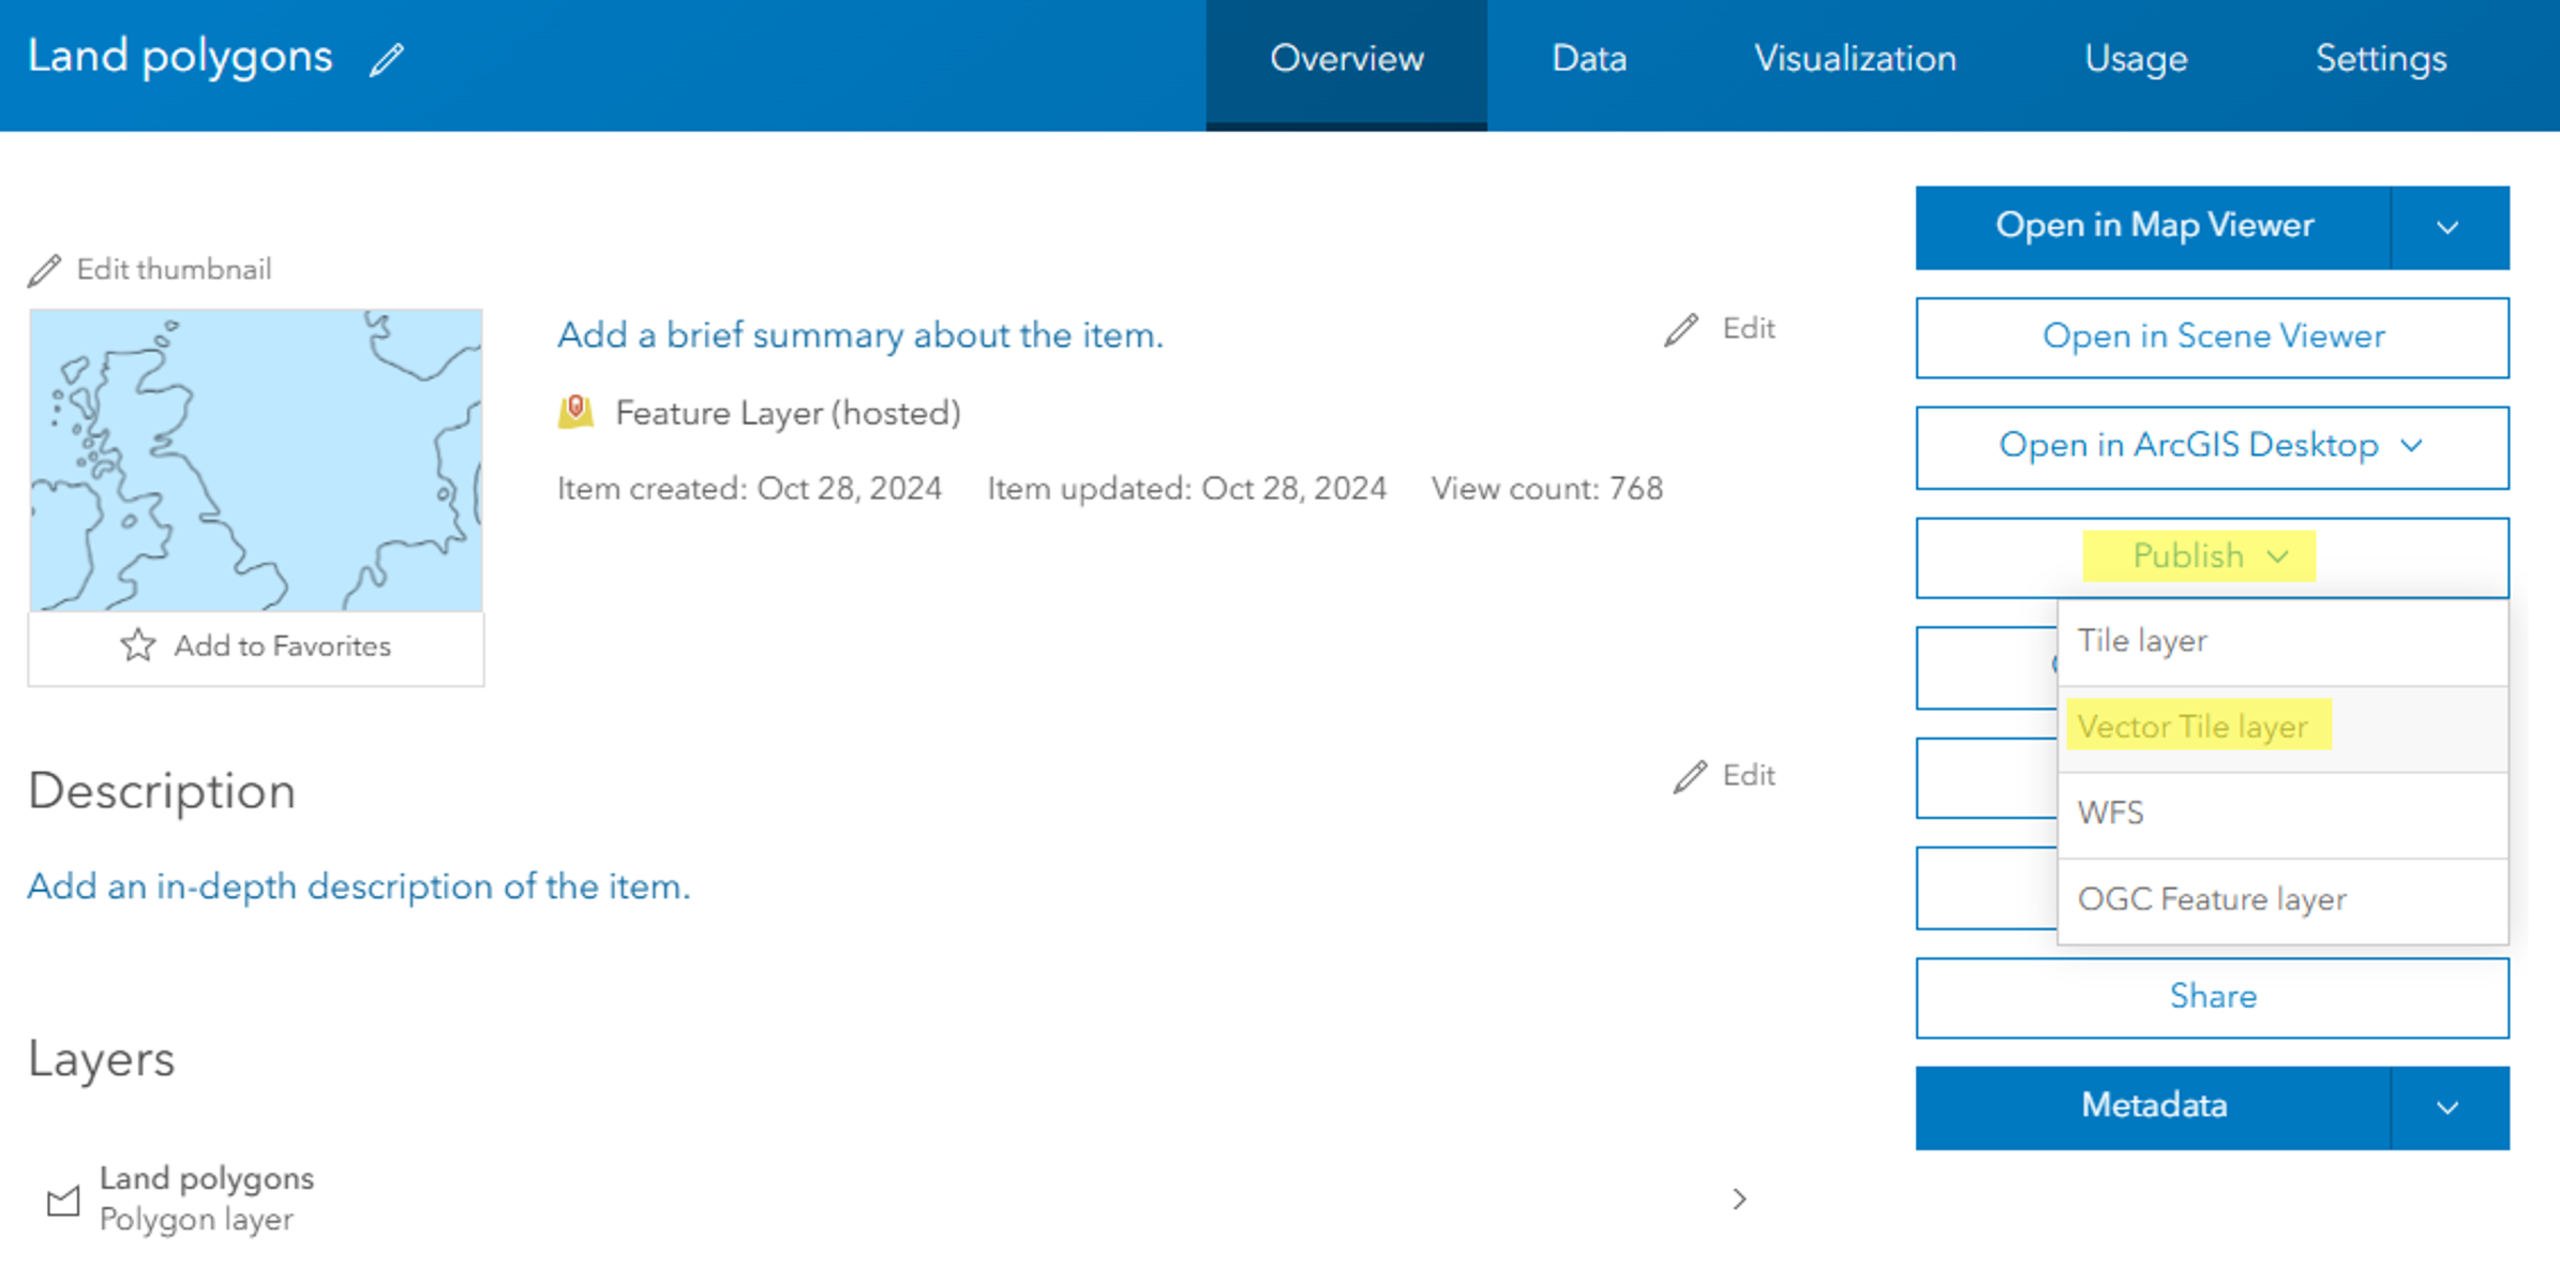
You can convert a feature layer in ArcGIS Online into Vector Tile layers from its Item Details page.
It’s important to note that your original feature layer will need to remain intact as a reference if you’re publishing a vector tile in this way. This means that you’ll miss out on the credit saving benefits of vector tiles. To publish a standalone tile layer, you’ll need to create a Vector Tile Package in ArcGIS Pro and share this to your ArcGIS Online portal. This can all be done with the Creator user type.
Publishing a Vector Tile Package from ArcGIS Pro
Vector Tile Packages contain a collection of vector tiles and style resources, and they allow you to bundle up your data as vector tiles and host them in ArcGIS Online as standalone layers. Thankfully, this is a simple process which requires just one Data Management tool in ArcGIS Pro.
You’ll need to start with a map which contains any layers you want to include in your vector tile. It’s important to make sure that other layers, like basemaps, are removed from your map through the Contents pane, otherwise the tool will fail to run. Once you’re happy with your map, open the Create Vector Tile Package (Data Management) tool and populate it with: your map, the name and file location to save your vector tile package to, and any information you would like to add as a summary or tags. The other parameters can be left as their defaults, unless you have any specific vector tile preferences and wish to change them. And it’s as simple as that – just click Run and you’ll have a vector tile package ready to go!
The final step is to upload your vector tile package to ArcGIS Online. This can be done using the Share Package (Data Management) tool in ArcGIS Pro, but I think the easiest way is to just upload the .vtpk file you created straight into your ArcGIS Online Content. Just a few clicks, and you’re able to enjoy your vector tile layer in all of its fast-rendering, high-performance glory.
You can upload vector tile packages (.vtpk files) directly to ArcGIS Online.
Creating new styles from existing vector tiles
Once you’ve created a vector tile layer, you can style it using the Vector Tile Style Editor. This means you can generate, save and share a variety of style options, without needing to host multiple copies of the source dataset.
There are lots of existing resources to help you make the most of your vector tiles; so if you’re interested, check out some of these: